Ribs & Counter Bores |
|
|---|---|
Right, the Check-It-Gauge measures the depth of a rib while the work piece is still in the EDM Machine. (Read Safety Precautions) Below, see other examples of rib depth inspection. Take note of the different tip styles used to fit into the ribs. |
|
.jpg) |
|
Checking a counter bore depth is made easy with the use of Check-It-Gauge. If you look closely at the top edge of the counter bore, you will see that a burr created by the machining process still exists. Notice how nicely the tool reaches over it to check the bottom of the counter bore. Counter sinks can also be checked with the use of a gauge ball or a specialty tip. |
.jpg) (Click images to enlarge) |
Engraving |
|
|---|---|
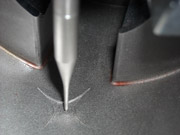
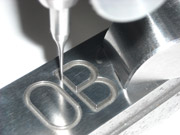
Check-It-Gauge is useful for inspecting the depth of the engraving in a logo insert. The ability to use different tip styles is a real plus for measuring intricate details. This is our standard .040" diameter tip that is included with the Check-It-Gauge set. |
|
Finding the lowest point of the engraving and then checking the step height to the cavity is the method being used here to measure the irregular engraving depth. The tip being used is our standard .040" diameter which has been modified by adding a 20 degree angle to the tip. |
 |
Using the same principle as above, a parallel was placed over the cavity to support the gauge while completing the measurement. If needed, extensions can be added between the indicator and the tip to increase the reach of the tool into deeper areas. (1" Extensions are available) |
.jpg) (Click images to enlarge) |
| Back to Top |
.jpg)
.jpg)
.jpg)
.jpg)
